Monday, June 6, 2011

Picture Perfect

 
This Tutorial was written by me on June 6; 2011.Any tutorial similar to this is coincidental and by no means is associated with such tutorial. “Picture Perfect” was written assuming its followers have working knowledge of PSP and its functions. All supplies used are credited to the artist/copyright owner with a link to their products and no supplies are provided by this site/me. If you follow this tut please give credit to BSD, Broken Sky Dezine, or http://brokenskydezine-gallery.blogspot.com. Either one of the three options are acceptable.

Supplies used for this Tutorial are credited to:
Program: PSP9
Font: Brush Script Std.

OK…let’s create a tag

Open paper 1, duplicate, and close original.
Open stones element, place on the bottom of paper on the left side. Go to layers>duplicate and then to Image>mirror.
Apply wave element and place on the left side of paper, slightly overlapping the stones. Duplicate wave and move it up and over to the right (see tag).
Apply the pier element and place in the center of paper (looks like the end of pier runs into the ocean).
Apply ship element to paper, resize 50% and move below the right wave element. Go to layers>blend>overlay>ok. Merge group.
Apply the sea star element, resize 25%, and place in-between the stones and the right wave on paper slightly overlapping the stones.
Apply bottle2 element. Go to image>rotate>free rotate>90%,left>ok and place on right side of paper sticking out of the wave.
Apply rope element, resize 75%, and place on the pier element @ the bottom.
Apply cloud element and place on top left corner of paper.
Apply the branch element, resize 50%, and place on the bottom of paper, below the pier but on top of the stones.
We’re going to use the wave element again, this time place it on the left side of paper, below the ship layer. Go to layers>blend>overlay>ok. Merge group.
Merge all layers visible.
Open frame 4. Go to selections>invert and paste your merged image inside frame. Press delete on your keyboard.
Apply flower3 element, resize 30%, and place on left side of frame. Go to layers>duplicate and then go to image>mirror.
Add copyright and name using your chosen font.
 Merge all layers visible

And here id my image w/o the frame.


Sunday, June 5, 2011

Bitches Rule


This Tutorial was written by me on June 5 , 2011.Any tutorial similar to this is coincidental and by no means is associated with such tutorial. “Bitches Rule” was written assuming its followers have working knowledge of PSP and its functions. All supplies used are credited to the artist/copyright owner with a link to their products and no supplies are provided by this site/me. If you follow this tut please give credit to BSD, Broken Sky Dezine, or http://brokenskydezine-gallery.blogspot.com. Either one of the three options are acceptable.

Supplies used for this Tutorial are credited to:
Program: PSP9
PTU Kit: Drama Bitches by Foxy Designz
Tubes By: Arthur Crow at PTE
Mask by: Insatiable Dreams (137)
Font: Ravie

OK…Let’s Play!!!

Open paper 6, duplicate, and close original.
Apply mask and merge layers>Group.
Resize all layers 500x500.
Open element 4, apply to canvas, resize 50%, and place on the top right of mask layer.
Select inside the frame with your magic wand tool. Go to selections>modify>expand>4>ok. Go to selections>invert and then paste paper 2 inside highlighted area. Press delete on your keyboard.
Move frame to top layer.
Select inside the frame with your magic wand tool. Go to selections>modify>expand>4>ok. Go to selections>invert and then paste your close up tube inside highlighted area. Press delete on your keyboard. Go to layers>blend>lighten>ok. Right click on tube layer in layers box and merge group.
Move frame to top layer.
Apply element 38, move down in layers box to just above mask layer, and place on bottom of tag. Use deform tool to bring in the sides of your element.
Apply element 5 to the left side of frame, resize 70%.
Apply element 7, resize 50%, and place on top of element 38 layer
(at the bottom of tag).
Apply element 30 to top layer, resize 45%, and place on bottom right. Use deform tool to tilt the element slightly to the right.
Apply element 4, resize 20%, and place on the bottom right next to element 30.
Apply element 34 , resize 70%, and place on the upper left side of tag.
Apply element 29 and place on top of element 4 and 30.
Apply full tube on top layer, resize 80%, and place on the left side of tag.
Apply your name and copyright info using the text box and chosen font anywhere you like on your tag.
Right click on the top layer in your layers box>merge>visible.
Save as jpeg or png to your pc and your finished.

Wednesday, May 11, 2011

A Touch of Burlesque

This Tutorial was written by me on May 11, 2011.Any tutorial similar to this is coincidental and by no means is associated with such tutorial. “ A Touch of Burlesque” was written assuming its followers have working knowledge of PSP and its functions. All supplies used are credited to the artist/copyright owner with a link to their products and no supplies are provided by this site/me. If you follow this tut please give credit to BSD, Broken Sky Dezine, or http://brokenskydezine-gallery.blogspot.com. Either one of the three options are acceptable.

Supplies used for this Tutorial are credited to:
Program: PSP9
PTU Kit: Touch of Burlesque  by: Dare's Designz
Tubes By: Olivia at CDO 
Template by: Divine Intentionz
Font: Affair

Let’s Play!!!!

Friday, May 6, 2011

A Moment In Time Tag & Quick Page


This Tutorial was written by me on May 5, 2011.Any tutorial similar to this is coincidental and by no means is associated with such tutorial. “ A Moment In Time” was written assuming its followers have working knowledge of PSP and its functions. All supplies used are credited to the artist/copyright owner with a link to their products and no supplies are provided by this site/me. If you follow this tut please give credit to BSD, Broken Sky Dezine, or http://brokenskydezine-gallery.blogspot.com. Either one of the three options are acceptable.

Supplies used for this Tutorial are credited to:
Program: PSP9
Kit: Reminiscence  by: Graphics by Pokadot
Tube: A Moment with You By: Zindy Nielsen
Mask: 363 By VixPSP
Font:Script MT Bold

Let’s Play!!!!
Remember: Always add drop shadows to your elements.
(this is a full size kit so the resizing is a bit dramatic compared
to resizing for a tagger sized kits.)
Open paper10, resize to 500x500, duplicate it and close the original. 
Apply your mask and merge layers (group).
Apply frame2 and resize 20%. Use magic wand tool to highlight the inside of the frame. Go to selections>expand>6>ok. Go to selections>invert and paste paper 2 into frame.Press delete on keyboard and deactivate mwt.
Apply doodle9, resize 20%, and place on top of mask layer.
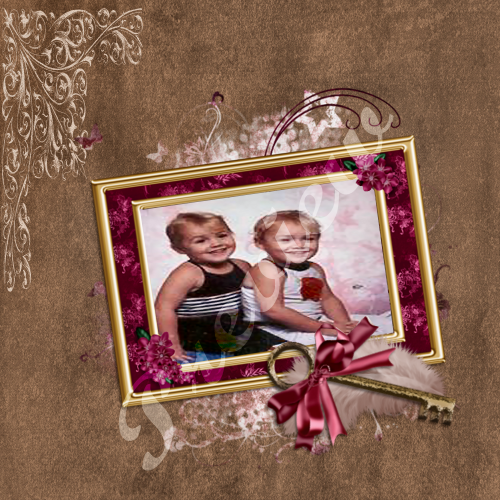
Apply feather element, resize 20%, and place on the bottom right of frame.
Apply key element, resize 20%, and place on top of the feather. 
Use deform tool to rotate the key.
Apply bow4 element, resize 10%, and place on top of key(under the loop) Use deform tool to rotate bow to your liking.
Select inside your frame with the magic wand tool. Go to selections>expand>6>ok. Go to selections>invert and apply your tube inside highlighted frame. Press delete on keyboard and deactivate the magic wand tool. Go to layers>new layer group>blend (luminance legacy)>ok.Go to layers>merge layers>merge group.
Open your text box now. type in the name or wording you want on your tag and apply. Place on tag where ever you'd like.
Now add your credits by repeating the previous step.
Go to layers>merge>visible
Your tag is now complete. Save to your pc in jpeg or png and you are done.
Thanks for trying my tutorial!!!


  And now... a peek at the matching quick page I made. 
This QP was created  at 300 dpi and is 3600x3600.Personal Use Only.
If you'd like to have this for scrapping your memories please visit 
Graphics by Pokadot for info on where to download it.


Monday, May 2, 2011

Ocean Treasures

I grew up on the beach for a large part of my life. I have amazing childhood memories of my family and friends spending long beautiful days on the beaches of The Outer Banks of NC. I want to thank Conchi for such a beautiful kit and allowing me to create with it.

This Tutorial was written by me on May 1; 2011.Any tutorial similar to this is coincidental and by no means is associated with such tutorial. “Ocean Treasures” was written assuming its followers have working knowledge of PSP and its functions. All supplies used are credited to the artist/copyright owner with a link to their products and no supplies are provided by this site/me. If you follow this tut please give credit to BSD, Broken Sky Dezine, or http://brokenskydezine-gallery.blogspot.com. Either one of the three options are acceptable.

Supplies used for this Tutorial are credited to:
Program: PSP9
(No Tube or Mask Used in this tut)
Font: Buffet Script

Let’s Play!!!!
Remember: Always add drop shadows to your elements.

Open starfish timon2 element (frame), duplicate and close the original. Resize frame 80% (make sure “resize all layers” is unchecked)
Activate your magic wand tool and select inside of your frame. Go to Selections>Modify>Expand>6>OK. Go to layer>invert and apply paper15. Press delete on keyboard and move frame to top layer.
Open starfish sweet fishing element and apply on top of frame.
Apply starfish sweet embeleshment2 to your canvas and move to bottom layer.
Apply sand element and move down below the frame layer. Use your deform tool to bring in the sides of the sand that hang off the edges of your canvas.
Apply starfish sweet anchor3 element, resize 40%, and place in the sand on the left side of frame.
Apply starfish sweet embellishment to canvas, resize 25%, and place on top of anchor.
Apply starfish sweet starfish onto canvas, resize 20%, and place on the right side of frame at the bottom.
 Apply starfish sweet bottle to your canvas, resize 45%, and use deform tool to rotate the bottle slightly up.
Apply starfish sweet heart rocks to your canvas, resize 10%, and place in the bottom right corner of tag in the sand.
Apply starfish sweet shell4 to your canvas, resize 50%, and use deform tool to rotate the image until the shell is up and the string is below.
Apply starfish sweet seahorse to your canvas, resize 25%, and place on the net at the top of your frame. Use your deform tool to rotate left, laying the seahorse on it’s back.
Apply starfish sweet shell 3 to your canvas, resize 25%, and place on the bottom left of the net.
Apply starfish sweet shell to your canvas, resize 25%, and place on the right side of the net.
Apply starfish sweet shells to your canvas, resize 25%, and place to the right of the seahorse element on the net.
Activate the frame layer by clicking on it in the layers box. Activate the magic wand tool and highlight the inside of frame.  Open starfish sweet dolphin element, resize 50% and then copy and paste into the highlighted frame. Use your move tool to place the dolphin on the left side (inside frame). The dolphin should then appear to be swimming in the ocean. Press delete on keyboard and deactivate your magic wand tool.
Now…Apply your name and credits and place on your tag where ever you’d like best.
Go to layers>merge>visible>ok.
Save to your PC (JPEG or PNG) and your finished.

Thursday, April 28, 2011

Emo Diva


This Tutorial was written by me on April 28; 2011.Any tutorial similar to this is coincidental and by no means is associated with such tutorial. “Emo Diva” was written assuming its followers have working knowledge of PSP and its functions. All supplies used are credited to the artist/copyright owner with a link to their products and no supplies are provided by this site/me. If you follow this tut please give credit to BSD, Broken Sky Dezine, or http://brokenskydezine-gallery.blogspot.com. Either one of the three options are acceptable.

Supplies used for this Tutorial are credited to:
Program: PSP9
Tube by: Verymany @ Pics For Design
Font: Undercapped Vinyl
Mask by: Insatiable Dreams Mask172

"Thanks Gina for letting me work with your awesome kit!!!"

Let’s Play!!!!
Open paper 10 and duplicate it. Close original paper and apply mask to your duplicate.
Go to Merge Layers>Merge group.
Apply Chicken wire element and resize 80%.
Open your frame 1 element and copy and paste on top of chicken wire..
Select inside your frame with your magic wand tool. Go to Selections>Modify>Expand>4>OK. Go to layer>invert and apply paper2. Press delete on keyboard and move frame to top layer.
Apply frayed flower element to canvas, resize 65%, and place on top of frame (top right).
Apply bling skull to canvas, resize 40% and place on top of frayed flower element.
Apply strappy boot1 to canvas, resize 40%, and place on top of frame (left bottom).
Apply lipstick1 to your canvas (No resizing), and place on top of frame on the right side.
Apply perfume element to your canvas, resize 40%, and place onto pod lipstick element. Use your deform tool to rotate the element slightly to the right.
Apply puckered element (lips) to your canvas, resize 10%, and duplicate 3x. Place one puckered lips on the top left corner of tag (on top of chicken wire), the second one on top of frame above the lipstick, and the third one (a bit lower) to the left   of the perfume/lipstick elements.
Apply your tube of choice. Place her on top layer, resize 60%.
Apply the word plate, resize 40% and place at the bottom of frame on top of your tubes legs/feet.
Apply flower4, resize 45% and place overlapping the right side of word plate.  Go to Layer> Duplicate then go to Image>Mirror, placing it the same way on the left side of word plate.
OK…here were going to apply another element, our name, and copyright info all in one.
First open the IPod2 element. Activate the text box and type in your copyright info and your name using your chosen font. Center the text in the screen of your I Pod. Merge Layers> Visible. Now copy and paste the IPod onto your canvas, resize 35%, and move to below the lipstick element in your layers box. Using the deform tool, rotate the I Pod element slightly to the right.
Go to layers>Merge>visible>OK, save to your PC, and your all finished. 


Sunday, April 17, 2011

Secret Garden

Tut Coming Soon!

My blu Fairy's World Quick Pagees

I created these 3 quick pages using Babyfairy's PTU kit "My blu fairy's world". This kit can be purchased @ Lollipops 'N Gumdrops. To get these adorable QP's please visit Babyfairy.
I just love this adorable kit (Thanks Babyfairy!!!) and here's one of the QP's with my youngest daughter.


Wednesday, April 13, 2011

Gothic Love


Gothic Love
This Tutorial was written by me on April 13, 2011. It was written assuming its followers have working knowledge of PSP and its functions. All supplies used are credited to the artist/copyright owner with a link to their products and no supplies are provided by this site/me. If you follow this tut please give credit to BSD, Broken Sky Dezine, or http://brokenskydezine-gallery.blogspot.com. Either one of the three options are acceptable.

Supplies used for this Tutorial are credited to:
Program: PSP9
Alien skin eye candy5: Impact
PTU Kit by: Heike of Fantasy Dreams Designzs  "Looks Like Love" sold @ The Creativity Box
PTU Tube by: Melissa Dawn sold @ CDO
 Font: Broken Ghost
“Heike…it was a pleasure to use your awesome kit!! Thank You!!”

In this tutorial we are creating a forum set. Commonly used in groups and forums here in the scrapping community. We are going to start with the avatar and then the tag to match.

Avatar:
Open a new canvas 200x200. Copy and paste paper1 into canvas, no need to resize. Apply deco19 and resize 30%. Go to Layers>New Layer Group>Luminance (Legacy)>Ok, and then Layers>Merge>Group. Apply Dragonfly2, resize 30%, and place between the L and O. Apply deco6, move below deco19 layer. Go to Layers>New Layer Group>overlay>Ok, and then Layers>Merge>Group. Apply your tube, use move tool to position to your liking. Open your text box>type in your name>OK. In layers box right click on vector layer (text) ans select “convert to raster layer”. Go to Effects>Plugins> Alien skin eye candy5: Impact>gradient glow>(choose your settings)>ok. Go to Layers>merge> visible. Go to Adjust>add/remove noise>add noise>5%>ok. Open your text box>type in your credits/license #>ok. Go to layers>merge>visible. Save your avatar to pc as PNG or JPEG.
.
Forum Tag:
Open a new canvas 600x250, copy and paste paper1 into canvas, no need to resize. Apply deco19, Go to Layers>New Layer Group>Luminance (Legacy)>Ok, and then Layers>Merge>Group. Use magic wand tool to select inside the L. Go to selections>invert and past tube inside highlighted area. Use move tool  to move the tube to the area you want inside the L. Press delete on keyboard and then go to Layers>New Layer Group>Luminance (Legacy)>Ok, and then Layers>Merge>Group. You are going to do the same as you did for the L to the O-V-E using different areas of the same tube. Apply deco6 and move down in your layers box to below the LOVE word art. Go to Layers>New Layer Group>Luminance (Legacy)>Ok, and then Layers>Merge>Group.  Apply flower11, resize 45%, and place between the V and E. Apply Dragonfly2, resize 30%, and place between the O and V. Apply your tube, use move tool to move the tube to the left of tag, on top of the L and O. Open your text box>type in your name>OK. In layers box right click on vector layer (text) and select “convert to raster layer”. Go to Effects>Plugins> Alien skin eye candy5: Impact>gradient glow>(choose your settings)>ok. Go to Layers>New Layer Group>Luminance (Legacy)>Ok, and then Layers>Merge>Group. Go to Adjust>add/remove noise>add noise>10%>ok. Open your text box>type in your credits/license #>ok and place on the upper right corner. Go to layers>merge>visible. Save your tag to pc as PNG or JPEG.
Thank you for trying my tut!!!

Monday, April 11, 2011

Chasing Butterflies

This Tutorial was written by me on April 11, 2011. It was written assuming its followers have working knowledge of PSP and its functions. All supplies used are credited to the artist/copyright owner with a link to their products and no supplies are provided by this site/me. If you follow this tut please give credit to BSD, Broken Sky Dezine, or http://brokenskydezine-gallery.blogspot.com. Either one of the three options are acceptable.

Supplies used for this Tutorial are credited to:
Program: PSP9
PTU Kit by: Stacey's Designs "Backyard Fun" sold @ Your Scrap Addiction
FTU Cookie Poser by: COH Scraps
"Thanks Stacey for allowing me to use your adorable kit hun!!!"

Let’s Play!!!!
 
***COMING SOON!!!!***