Saturday, December 17, 2011

I want to rock you

 
This Tutorial was written by me on December 15 , 2011.Any tutorial similar to this is coincidental and by no means is associated with such tutorial. "Santa Express" was written assuming its followers have working knowledge of PSP and its functions. All supplies used are credited to the artist/copyright owner with a link to their products and no supplies are provided by this site/me. If you follow this tut please give credit to BSD, Broken Sky Dezine, or http://brokenskydezine-gallery.blogspot.com. Either one of the three options are acceptable.

Supplies used for this Tutorial are credited to:
This tutorial was created in PSPX3
PTU Scrap-kit:Kandy Kat By: Pink Candy Designs
Sold at:Lollipops N' Gumdrops
PTU Tubes ©XRACX 
Font:Dancing Script OT
Template: 439  By: Missy


Friday, December 16, 2011

I've got something you can open early

My hubby wanted a new pic to put on his phone for wallpaper so I made him this tag.
I used Barbara Jensen's new holiday tubes and the template is from Missy.
Happy Holidays Everyone!

Santa Express

 
This Tutorial was written by me on December 15 , 2011.Any tutorial similar to this is coincidental and by no means is associated with such tutorial. "Santa Express" was written assuming its followers have working knowledge of PSP and its functions. All supplies used are credited to the artist/copyright owner with a link to their products and no supplies are provided by this site/me. If you follow this tut please give credit to BSD, Broken Sky Dezine, or http://brokenskydezine-gallery.blogspot.com. Either one of the three options are acceptable.

Supplies used for this Tutorial are credited to:
This tutorial was created in PSPX3
PTU Scrap-kit: Santa Express By: Angel's Designz
Sold at: The Creativity Box
PTU Tubes ©Barbara Jensen
Font: Santa's Sleigh Full
Template: #437  By: Missy
 
Let's Get Started!
-Duplicate your template and close the original and resize 600x440.
The next several steps is just plugging in your papers into the template layers.
pp12-raster 1 &3
pp11-shapes
pp7-oval
Delete the snowflakes layer.
pp6-thin rectangle
pp14-rectangle
pp8-rectangle
pp12-frame
Delete the word art and word art backing.
Now apply your tube,resize 80%, and place on top layer (in center of template)
Apply lights element, resize 85%, and place below the tube layer (at the top of template)
Apply the snowflake doodle element, place below the raster 6 layer...duplicate & mirror it.
Delete the dotted oval layer.
Apply the stocking element, resize 60%, place it on left side of the frame...duplicate and mirror it.
Activate your square selection tool. Make a square on top layer,over the entire template area. Go to selections>invert>ok. Paste the snow element inside and press delete on your keyboard.
Move the tube to top layer.
Apply present #2,resize 40% and place on the right side of your tube. Now move it below the tube layer...duplicate & mirror it.
Apply present and resize 40%. Place it behind your tube so it looks like she is sitting on it.
Apply mistletoe, resize 40% and place on bottom left,below the oval layer...duplicate & mirror it.
Apply candycane element, resize 40% and move below the snow element layer....duplicate & mirror it.
Apply your name using your chosen font and place it on your tag to your liking.
Apply credits &License #, then merge your tag visible.
Save your tag. PNG or JPEG if you want a white background on your tag.
Thanks for trying my tut & Happy Holidays to you!!!

Tuesday, November 22, 2011

Silent Night Tag,Cluster pack (Freebie), and Desktop Background (Freebie)

I created quie a bit of goodies with Alison aka Hungry Hill Scraps new PTU scrapkit "Silent Night".
First is a tag with a quick tutorial then a set of 4 cluster frames and a desktop background. The frames and background are being given away as freebies over on the Hungry Hill blog HERE. Please remember to give Thanks to Ali when you snag them. She's very talented and puts alot into bringing you freebies.
OK...here we go!!

This Tutorial was written by me on November22, 2011.Any tutorial similar to this is coincidental and by no means is associated with such tutorial. "Silent Night" was written assuming its followers have working knowledge of PSP and its functions. All supplies used are credited to the artist/copyright owner with a link to their products and no supplies are provided by this site/me. If you follow this tut please give credit to BSD, Broken Sky Dezine, or http://brokenskydezine-gallery.blogspot.com. Either one of the three options are acceptable.

Supplies used for this Tutorial are credited to:

This tutorial was created in PSPX3
PTU Scrapkit:Silent Night By: Hungry Hill Scraps
Mask: Winter By: Jenny
(I don't have this link but if it belongs to you and you'd like credit please message me)
Lets begin...

Open a new canvas 600x600/transparent.
Paste paper4 onto canvas.
Apply tree1 to the left side,duplicate,and mirror it.
Apply tree3 and move below the tree1  layer and place behind tree1 on the right side.
Apply tree2,resize 75% and place in front of tree1 on the left side. Duplicate and mirror it.
Apply deer3,resize 50% and place behind copy of tree2on right (upper body of deer sticking out of trees).
Apply gifts element,resize 25%,and place below the tree2 layer on the left.Duplicate the gifts element and move to the right but staying under the tree.
Apply the flurry element,no resize needed,move in layers pallet and place on top of paper4.
Open all your ornament elements. Each element was resized 10%,duplicated,
and placed sparadicly on top of the trees.
Merge all layers>visible.
Apply your mask,merge>group,and resize 95%.
Apply paper2 onto canvas,move to bottom layer and apply your name and credits.
 merge all layers>visible.
Save as PNG or JPEG.
And now for the freebie cluster frames and desktop background...


Thanks for your visit and Happy Holidays!

Monday, November 21, 2011

Let It Snow

Check out this beautiful tag I made using Kairinakat Kreations PTU scrapkit "Snow Days".
You can purchase this lovely kit at The Creativity Box and right now sh has her shop on sale 50% off.
Thanks Shelly for this beautiful kit to work with!
Also, credit for the tube used in my tag is ©Ellie_Milk at PFD and the template I used is 
credited to Freebie Friends found HERE.
 
I didn't do a tut for this tag but the idea behind it's creation was my 
own and all supplies used to create this tag were credited above.
Thanks for looking!
XOXOXO

Thursday, November 10, 2011

Winters Dream

This Tutorial was written by me on November10, 2011.Any tutorial similar to this is coincidental and by no means is associated with such tutorial. "Winters Dream" was written assuming its followers have working knowledge of PSP and its functions. All supplies used are credited to the artist/copyright owner with a link to their products and no supplies are provided by this site/me. If you follow this tut please give credit to BSD, Broken Sky Dezine, or http://brokenskydezine-gallery.blogspot.com. Either one of the three options are acceptable.

Supplies used for this Tutorial are credited to:

PTU Scrapkit: Winter Dreams By: Le Paradis De Scraps Sold at: LNG
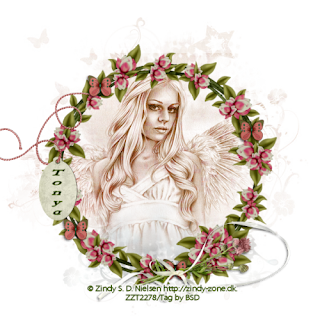
Tube: Catching Snowflakes By: Zindy S.D. Nielsen
Mask: #5 By: Insatiable Dreams
Font: Jellyka Delicious Cake
 
Let's Make a tag!!!

Open paper 13, duplicate it, and close the original.
Apply the tree (element 1) to the left side of paper.
Apply the second tree (element 42) to the right side of paper.
Apply the fence (element to the center,rezize 50%, and move to the bottom layer.
Apply the snoe (element 2) to the bottom,on top layer.
Apply your tube to the center of your paper.
Merge All layers(visable) and Apply your mask,merge(group).
Merge all layers.
Open your frame (element C5),duplicate it and close the original. Use your magic wand tool to highlight the inside of frame.Go to Selections>Modify>Expand>3>ok. Then go to Selections>Invert. Paste your merged image inside your frame and press delete.
Move frame to top layer.
Apply your ribbon(element 11). Activate your deform tool and tilt the top of the ribbon down just a bit.
Apply your bow (element 52), resize it 25%, and place it at top center of frame (on top of ribbon).
Merge all layers(visable) and resize 500x543/72.dpi.
Resize merged layer  90% (make sure "All Layers" is not checked).
Apply Sparkles (element 32) to the bottom layer.
Add your name and copyright/license # and merge all layers (visable).
Your Finished!!!

Sunday, November 6, 2011

Sexy Lil Witch


This Tutorial was written by me on October 31, 2011.Any tutorial similar to this is coincidental and by no means is associated with such tutorial. "Tricks-N-Treats" was written assuming its followers have working knowledge of PSP and its functions. All supplies used are credited to the artist/copyright owner with a link to their products and no supplies are provided by this site/me. If you follow this tut please give credit to BSD, Broken Sky Dezine, or http://brokenskydezine-gallery.blogspot.com. Either one of the three options are acceptable.

Supplies used for this Tutorial are credited to:

Kit: Witches Brew By: Honored Scraps Sold at: The Creativity Box
PTU Tube: Blueberry © Barbara Jensen
Template: #109 By:  Beth
Font: Witches Magic From: Font Space

Open your template,duplicate it and close the original. Delete the credits and activate the background layer. Apply your mask and merge>group.
Highlight the gray rectangle with your magic wand tool and invert it. Apply paper8,press delete.
Highlight the orange rectangle frame with your magic wand tool and invert it. 
Apply paper5,press delete.
Highlight the oval with your magic wand tool and invert it. Apply paper5,press delete.
Highlight the oval frame with your magic wand tool and invert it. Apply paper2,press delete.
Highlight the black rectangle with your magic wand tool and invert it. Apply paper4,press delete.
Highlight thewhite rectangle with your magic wand tool and invert it. Apply paper9,press delete.
Highlight the oval with your magic wand tool and invert it. Apply your close up tube & press delete.Then blend> Luminance(Legacy)
Apply web beloe the oval layer in the center of template.
Apply tree3 on top of merged mask layer,to the right.
Apply pumpkin2,resize 65%, & place on the top layer,bottom left.
Apply the crow, resize 30%,place above the black rectangle on the right.
Apply the caldron2 element,resize 65%, & place on the bottom right.
Apply the witches hat element,resize 65%, & place between the
pumpkin2 element and the caldron2 element.
Add tour credits/copyright info & merge all layers>visible.
Rezize all layers>72dpi>600x600.
Using your chosen font appy your name and merge all layers again and save to your PC as PNG or JPEG.


Monday, October 31, 2011

Tricks-N-Treats

This Tutorial was written by me on October 31, 2011.Any tutorial similar to this is coincidental and by no means is associated with such tutorial. "Tricks-N-Treats" was written assuming its followers have working knowledge of PSP and its functions. All supplies used are credited to the artist/copyright owner with a link to their products and no supplies are provided by this site/me. If you follow this tut please give credit to BSD, Broken Sky Dezine, or http://brokenskydezine-gallery.blogspot.com. Either one of the three options are acceptable.

Supplies used for this Tutorial are credited to:
 PTU Scrapkit by:Foxy's Designz @ Digi Foxs Studio
Tube by: Lady Mishka @ PFD
Font: Ruach LET
Mask by: DBV #111
Open element41,duplicate, and resize to 600x615.
Apply element49(frame) on top of element 41.Resize 50% and place center. Go to selections>modify>expand>3.OK, then go to selections>invert, and paste paper 7 inside.Press delete and deselect your magic wand tool.
Copy tor tube and paste it onto your canvas in between the paper 7 layer and the element 49 (frame) layer. Now, making sure your frame layer is checked in your layers pallet, use your eraser tool to remove the upper part of frame that covers the head/hair/left side of your tube (giving the appearance your tube is coming out of the frame).
Apply element50 0n top layer at the bottom of frame,resize 30%.
Apply element35,resize 30%, and place left of element50.
Apply element6,resize 35%, and place right of element50.
Apply element39,resize 50% and place on top of element41 layer (sticking out below the cupcakes.
Apply element34, resize 50%, and place below the paper7 layer (sticking out from behind the frame) Go to layers>duplicate, then image>mirror.
Apply element1,resize 30%, and move below element34 on the left side.
Apply element2,resize 30%, and move below the duplicate element34 layer on the right side. Go to image>flip.
Apply element36 ,resize 30%, and move to the left side below element1. Go to layer>duplicate and then image>mirror.
Open paper9,resize 600x600. Copy and paste paper into a new layer. Move to bottom layer and apply your mask. Go to layers>merge>group.
Apply your copyright and license #.
Apply your name, the go to layers>merge>visible>ok.
Save to your PC as JPEG or PNG.

Harvest Home Forum Set

I created this forum set using Hungry Hill's PTU scrapkit "Harvest Home" sold at Digi Fox's Studio.
And this lovely Fall tube is PTU ©Zindy S.D. Nielsen


Thursday, October 20, 2011

Dark Mistress

This Tutorial was written by me on October 20, 2011.Any tutorial similar to this is coincidental and by no means is associated with such tutorial. "Dark Mistress" was written assuming its followers have working knowledge of PSP and its functions. All supplies used are credited to the artist/copyright owner with a link to their products and no supplies are provided by this site/me. If you follow this tut please give credit to BSD, Broken Sky Dezine, or http://brokenskydezine-gallery.blogspot.com. Either one of the three options are acceptable.

Supplies used for this Tutorial are credited to:
 
Kit: Dark Mistress By Hungry Hill Scraps
Sold Exclusively at: Digi Fox's Studio
PTU Tube: "Evil Queen" ©Keith Garvey Sold at: PTE
FTU Font:Wicked Queen From:Dafont
Tag Template: 400  By: Missy of Divine Intentionz
 
Lets Make a tag
Open your template,duplicate it, and close the original. Erase the white background, word art, and the credits. OK...Were working from the bottom layer up.
 Highlight the center circle2, go to selections>invert,paste paper3 inside, and press delete.
 Highlight the square, go to selections>invert,paste paper6 inside, and press delete.Repeat this step for square2.
Highlight the rectangle, go to selections>invert,paste paper11 inside, and press delete.Repeat this step for rectangle2.
Highlight the circle back, go to selections>invert,paste paper4 inside, and press delete.Repeat this step for circle back2.
Highlight the circle, go to selections>invert,paste paper9 inside, and press delete.Repeat this step for circle2.
Highlight frame1, go to selections>invert,paste paper3 inside, and press delete.Repeat this step for frame2 and circle back.
Highlight the frame back, go to selections>invert,paste paper2 inside, and press delete.Repeat this step for frame back2.
Highlight the center circle, go to selections>invert,paste paper10 inside, and press delete.
Go back to your frame back layer. Highlight it,go to selections>invert,and paste your closeup tube inside. In layers box move your tube above the paper layer and resize 50%. Press delete and blend layers>luminance. Repeat this step for frame back2.
Highlight the center circle and invert it. Apply your half tube, resize 70%, move above the paper layer,and press delete.Keeping your tube layer active blend hard light.
Apply candle element to the left,resize 70%, and move to bottom layer. Go to layers>duplicate. Them image>mirror,placing the duplicate candle on the right.
Apply corner web element and place below the circle1 layer.
Apply bow2 element on the left side of the tube (see tag for placement),duplicate it, and move it to the right side of the tube( see tag for placement),
Using your chosen text apply word art/name to the center of tag at the bottom using a light gray color. Repeat this step only using red this time. Place the second set of text on top of the other.
Apply one red and one black rose on the left side of your text. Resize each rose 15%. Repeat this for the right side of text.
Apply diamond circle2, resize 60%, and move below raster 15 layer (above center circle template layer)
Apply License#/credits, merge all layers visible, and Resize tag to 600x414.
Your Finished!!!!

Rustic Garden

I created this tag using Sweet Occasion Designs PTU scrapkit "Rustic Garden". This beautiful kit can be purchased from Lollipops N' Gumdrops in Karen's shop.
Credits for materials used to create this tag go to Mystical Illusisonz for her FTU cookie "Kalynn".
Also, Dafont.com for the Jellyka Delicious Cake Font and Weescotlass Mask 208 here.

Tuesday, October 11, 2011

Dare Devil

This Tutorial was written by me on October 11, 2011.Any tutorial similar to this is coincidental and by no means is associated with such tutorial. "Dare Devil" was written assuming its followers have working knowledge of PSP and its functions. All supplies used are credited to the artist/copyright owner with a link to their products and no supplies are provided by this site/me. If you follow this tut please give credit to BSD, Broken Sky Dezine, or http://brokenskydezine-gallery.blogspot.com. Either one of the three options are acceptable.

Supplies used for this Tutorial are credited to:
Program: PSP X3 (any version will do) 
Kit: Dare Devil By Kim's Korner 
Sold @: The Creativity Box
Tube © Rebecca Sinz @ DSI
Mask by: WSL #83
Font:Stank from Font Space

OK...Let's make a tag!!
(Add a black drop shadow to all elements)
 
Open paper 24,duplicate it ,add your mask and merge layers (group).
Apply frame to the center of the mask layer. Using your magic want tool select inside your frame.Go to selections>modify>expand>5>OK. Then go to selections>invert. Paste paper 13 inside frame and press delete.
Apply bow 2 to your canvas,re-size 40%,and move to the upper right corner of frame.
Apply blood drip element to the top of your frame and blend(burn).
Apply candle2 to the bottom right corner of frame.
Apply the blood drip element and place on top of the candle 2 element,blend(burn).
Re-size your canvas 600x600(All Layers but do not merge).
Apply your tube,re-size 90%, and place below the candle2 element.
Apply your name and add a white drop shadow.
Apply your copyright info and add a white drop shadow.
Merge all layers (visible) and save to your PC.

Friday, September 30, 2011

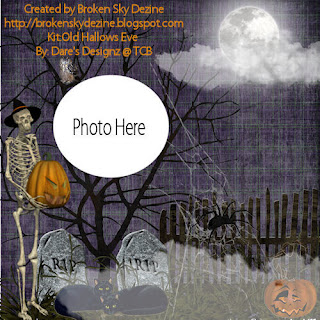
Old Hallows Eve Tutorial


This Tutorial was written by me on September 29, 2011.Any tutorial similar to this is coincidental and by no means is associated with such tutorial. "Old Hallows Eve" was written assuming its followers have working knowledge of PSP and its functions. All supplies used are credited to the artist/copyright owner with a link to their products and no supplies are provided by this site/me. If you follow this tut please give credit to BSD, Broken Sky Dezine, or http://brokenskydezine-gallery.blogspot.com. Either one of the three options are acceptable.

Supplies used for this Tutorial are credited to:
Program: PSP X3 (any version will do)
Kit: Old Hallows Eve By Dare's Designz 
Sold @: The Creativity Box
Mask by: XEN #08
Font: Wild Wood from Font Space

OK...Let's make a tag!!

"Please note that this is a full size scrapkit. The resizing is a bit dramatic. 
I don't usually do tuts with FS kits but I was inspired by this kit and I wanted to use BJ's awesome Halloween tube."
*Put a black drop-shadow on ALL elements*
Open a new canvas 600x600.
Open paper 3 and paste into your canvas.
Apply your mask and merge>group.
Apply grass element, re-size 20%, and place at the bottom of the mask.
Apply the tree element,re-size 15%, and move it below the grass.
Apply the owl element, resize 3%, and place high on one of the tree branches.
Apply the tumbstone element, re-size 7%, place it on the left side of the tree/below the grass element.
Apply the fence, re-size 20%, and move down,place it on top of mask layer.
Apply the spiderweb,re-size 10%, and place it on the right side of canvas.So it looks like its attached to both the tree and the fence. 
Adjust the color to gray,so it shos up better.
Now apply the spider to the web,re-size it 10%, and apply a gray drop-shadow(not black).
Apply the cloud & moon element, re-size 10%, and place in the upper
right corner on top of mask layer.
apply the pumpkin element,re-size 10%, and place on the right side of the fence.
Apply the skeleton element, re-size 15%, and place to the left of the tombstone element.
Apply your tube to the center of your canvas and re-size her 80%.
Using your text box and your chosen font, type in your name and then convert text to raster layer. Move text and place it on top of the cloud. Then blend>luminance (legacy) and merge>group.
Apply your credits and then merge your layers>visible.
Save your tag to your PC as a PNG or as a JPEG if you want a white backgroung.
Thank You for trying my tutorial!


Old Hallows Eve Layout & QP Freebie

I created a layout and a quick page using Dare's Designz PTU "Old Hallows Eve" scrapkit. You can purchase this kit in her shop @ The Creativity Box. To download the free quick page please visit Dare's Designz blog for instructions. 
Thanks DD for letting me create with your lovely Halloween kit!

Layout "Old Hallows Eve"

Free Quick Page "Old Hallows Eve"

Friday, September 23, 2011

Spider Winch

This tag was created by me using DNScraps PTU kit "Spider Delight". 
You can purchase this spideriffic kit at Lollipops N Gumdrops.
Thanks Conchi for allowing me to use your lovely creations.

Friday, September 16, 2011

Flirting with Fall


This Tutorial was written by me on September 16, 2011.Any tutorial similar to this is coincidental and by no means is associated with such tutorial. "Flirting with Fall" was written assuming its followers have working knowledge of PSP and its functions. All supplies used are credited to the artist/copyright owner with a link to their products and no supplies are provided by this site/me. If you follow this tut please give credit to BSD, Broken Sky Dezine, or http://brokenskydezine-gallery.blogspot.com. Either one of the three options are acceptable.

Supplies used for this Tutorial are credited to:
Program: PSP X3 (any version will do)
PTU Kit: Flirting with Fall By: Dark Moon's Dream Sold @ LNG
PTU Tube by: Anna Marine @ CDO
FTU Mask By: DBV #111
Font : Giddy Up Std
OK...Lets make a tag:
Open a new canvas 600x600/72dpi
Flood fill your canvas white
Copy & Paste paper 1 to your canvas as a new layer,apply your mask and merge layer >group.
Apply the fence element to your canvas and leave it where it is.
Apply your full tube to the center of the fence element.
Apply the mushroom element to your canvas, re-size 70%, and place on the left side of fence.
Apply flowerpot, re-size 70%, and place to the right side of the fence.
Apply the acorn element to your canvas, re-size 45%, and place to the left of the mushroom element.
Apply the deco 07 element & place it on top of merged mask layer.
Apply corn element , re-size 45% and place in front of the flowerpot element.
Apply the butterfly element, re-size 30%, and place it on your canvas just above the fence on the left.
Apply the bird element, re-size 30%, and place it on the fence on the right side.
Apply name using text box. Go to your layers pallet and right click on the text layer. Then click "convert to raster layer". Go to Effects>artistic effects>glowing effects>choose settings>ok.
Apply copyright and license # for the tube used using your text box and apply to tag.
Go to layers>merge visible. Then save your tag to your PC.
Thanks for trying my tut!
Tonya

Wednesday, September 7, 2011

Just a Lil Funk

This Tutorial was written by me on September 6, 2011.Any tutorial similar to this is coincidental and by no means is associated with such tutorial. "Just a lil Funk" was written assuming its followers have working knowledge of PSP and its functions. All supplies used are credited to the artist/copyright owner with a link to their products and no supplies are provided by this site/me. If you follow this tut please give credit to BSD, Broken Sky Dezine, or http://brokenskydezine-gallery.blogspot.com. Either one of the three options are acceptable.

Supplies used for this Tutorial are credited to:

Program used: PSP 9
Scrap kit: Little Bit of Funk By Kairana Kat 
@ TCB
Tube by: Arthur Crow @ PTE
Mask by: WSL #154

OK…Lets begin!!

The Race Is On

This Tutorial was written by me on September 6, 2011.Any tutorial similar to this is coincidental and by no means is associated with such tutorial. "The Race Is On" was written assuming its followers have working knowledge of PSP and its functions. All supplies used are credited to the artist/copyright owner with a link to their products and no supplies are provided by this site/me. If you follow this tut please give credit to BSD, Broken Sky Dezine, or http://brokenskydezine-gallery.blogspot.com. Either one of the three options are acceptable.

Supplies used for this Tutorial are credited to:

Program used: PSP 9
Scrap kit: Race Driver By: Rebellious Scraps
Mask by: WSL #148

OK…Lets begin!!

Open a blank canvas 700x700 & flood fill white.
Copy & paste paper 1 on to your canvas. Apply your mask & merge layers>group.
Apply frame 1 to the left side of your canvas, resize 65%, & then go to selections>modify>expand>4>ok. Then go to selections>invert>ok. Now paste paper 5 into your highlighted area. Press delete on keyboard. (You will need to repeat this for each section of the frame). Move frame to top layer.
Highlight the top section of frame and invert it . Copy and paste your tube into it and press delete. Only the head /top half of your tube should be inside the frame. Blend soft light. Highlight the middle section of frame and invert it it. Copy and paste your tube into it and press delete. Only the breasts of your tube should be inside the frame. Blend soft light. Highlight the middle section of frame and invert it it. Copy and paste your tube into it and press delete. Only the mid section of your tube should be inside the frame. Blend soft light.
Apply flames 4 element to the bottom of your canvas. Move down until it is on top of the mask layer.
Apply helmet, resize, & place on the left side, on top of the flame element.
Apply wire element and place on top of mask layer.
Apply flag 2 element, resize 80%, & move down in your layers box, place on top of mask layer.
Apply flag 1 element, resize 65%, & place on the right side of canvas
Apply the stoplight element, resize, & place right of the flag 1 element.
Copy and paste your tube on the top layer. Re-size 40% & place it to the left of the canvas.
Apply car 3 element, resize 65%, & place on the right side of your canvas.
Apply the pit pass element, resize 15%. Use your deform tool to rotate the pit pass until the clasp looks like its connected to the chain on the tube.
Apply your copyright info &Your name. Place them where you like.
Delete the white background layer and merge all layers visible.
Save to your PC as a JPEG or png file and your finished.

Thursday, August 25, 2011

As Time Goes By Desktop Background

Ali aka Hungry Hill Scraps specifically requested I create 
her a desktop background using her As Time Goes By kit. 
So here it is...Created at 300 dpi it is 1024x768 and personal use only.
Please leave Ali some love when dl this from her blog HERE.

Cherry Pie Desktop Background


I created this desktop background using Hungry Hill Scraps PTU kit "Cherry Pie"  and you can purchase this kit at SATC. You can download this DT-Background from Alis blog HERE.
Thanks Ali for an awesome kit to create with!!!

Saturday, August 20, 2011

Tainted Love

Tainted Love...I used this a PTU scrapkit created by the lovely Ali of Hungry Hill Scraps to create this tag and the two cluster frames below. You can purchase this awesome kit at Digi Foxs Studio and to get the clusters for FREE pop on over to Ali's blog where I will provide a dl link for you. Remember: to leave Ali some love for the frames when you dl them.
Credits for the tag go to the Amazing Zindy Nielsen for the Twilight tube I used for this tag.
And credits to WSL for mask #4 as well.
Thanks peeps for some good tagging materials!!!


Friday, August 19, 2011

Mitsumata Quick Pages

I created these two QPs using Silver Fox Studios PTU kit " Mitsumata" at LNG.
Images used in my previews are of myself and my family. These are personal use and 
you may not right click and save to your PC or any other site/device. For dl info please click on 
Silver Fox Studios link and visit her blog for directions on where/how to get these.
This is a beautiful kit...grate for layouts!!!


Template used for this layout is credited to Wilma4Ever.


Wednesday, August 3, 2011

I Need Speed

This Tutorial was written by me on August 3, 2011.Any tutorial similar to this is coincidental and by no means is associated with such tutorial. "I Need Speed" was written assuming its followers have working knowledge of PSP and its functions. All supplies used are credited to the artist/copyright owner with a link to their products and no supplies are provided by this site/me. If you follow this tut please give credit to BSD, Broken Sky Dezine, or http://brokenskydezine-gallery.blogspot.com. Either one of the three options are acceptable.

Supplies used for this Tutorial are credited to:
Program: PSP9 and Alien Skin Eyecandy5:Impact (Gradient Glow)
 PTU Kit: Need 4 Speed By: Angel's Designz @ The Creativity Box
{This is my first time using Angel's kits and I've known her for yrs. 
Thanks babe for an awesome kit to work with.}
PTU Tube by: Arthur Crowe @ PTE
Let’s get started


1.Open a new canvas 600x600
2.Paste filmstrip element on to canvas and paste papers 6 and 7 into each square alternating the papers.
3Move frame to top layer. 
4.Select inside first square(on left) with your magic wand tool. Go to selections>invert and paste closeup tube inside, resize tube to 40%, and blend>luminance. 
5.Repeat step 4 in the last square
6.Repeat step 3
7.Apply frame 1 to your canvas on top of filmstrip, and resize 80%. Go to Image>rotate>free rotate>10.00/left>ok. 
8.Apply frame 1 to your canvas again, and resize 80%. Go to Image>rotate>free rotate>10.00/right>OK. 9. Select inside of the frame 1 on the bottom with your magic wand tool. Go to selections>modify>expand>4>ok and then go to selections>invert. Now paste paper 3 inside highlighted frame. Press delete on keyboard and move frame above paper 3 layer.
10.Repeat step 9 using paper 10.
11. Apply colorful background to your canvas, move down in your layers box to just above raster1.
12. Apply full tube below your copy of frame1, resize 90%. Now activate your eraser tool and erase the part of the frame that overlaps the tubes head.
13. apply the ipod element, resize 30% and place it to the right of frames.
14. apply headphones, resize 30%, and place below the ipod element.
15.Apply starskatter, resize 95%, and move down on top of filmstrip layer,placing it at the lower half of canvas.
16.Apply bow2,resize it and place on upper left corner of (bottom) frame one.
17.Apply bow3,resize it and place on upper right corner of (copy) frame one.
18.Apply speedlimit sign, resize 15%, and place it below bow 2.
19.Apply sunglasses element, resize and place on top of iPod.
20. Open your text box and apply your name. Select inside each letter of your name with the magic wand tool and do to selections>invert and paste paper 11 inside each letter.
21. In your layers box; X out all layers except your text layer and the paper layers used in your name. Now merge layers visible and unclick all the Xed out layers. 
22. On your merged layer, we are going to add gradient glow. Go to effects>plugins>
Alien Skin Eyecandy5:Impact>gradient glow>(select your settings)>OK.
23. Using your text box, apply proper credits and copyright info.
24. Merge all layers visible and save to your PC.
Your Finished!!!

Angel

This Tutorial was written by me on August 2, 2011.Any tutorial similar to this is coincidental and by no means is associated with such tutorial. "Angel" was written assuming its followers have working knowledge of PSP and its functions. All supplies used are credited to the artist/copyright owner with a link to their products and no supplies are provided by this site/me. If you follow this tut please give credit to BSD, Broken Sky Dezine, or http://brokenskydezine-gallery.blogspot.com. Either one of the three options are acceptable.

Supplies used for this Tutorial are credited to:
 
Program: PSP9
 PTU Kit:Twilight Rose By:Foxys Designz
PTU Tube by: Zindy  Nielsen
 FTU Mask: Vix363
 
Let’s get started

Open paper 6 and duplicate it.
Apply your tube to the center of your paper as a new layer.
Apply the clouds element to the bottom of the tube
Merge all layers visable.
Apply your mask and merge layers>group.
Apply frame 4, resize 80%, and place on top of merged mask layer.
Apply the butterfly element, resize 20%,duplicate the butterfly 4x and place around the frame as you like.
Apply the tag element, resize 40%, and place on the left side of frame.
Apply flower ribbon element, resize 45%, and place at the bottom of frame.
Apply your name.
Apply your credits/copyright
Merge all layers>visible
Your Finished!!!

Aching for You

This Tutorial was written by me on August 2, 2011.Any tutorial similar to this is coincidental and by no means is associated with such tutorial. "aching for You" was written assuming its followers have working knowledge of PSP and its functions. All supplies used are credited to the artist/copyright owner with a link to their products and no supplies are provided by this site/me. If you follow this tut please give credit to BSD, Broken Sky Dezine, or http://brokenskydezine-gallery.blogspot.com. Either one of the three options are acceptable.

Supplies used for this Tutorial are credited to:
 
Program: PSP9
 PTU Kit:Twilight Rose By:Foxys Designz
PTU Tube by: Zindy  Nielsen
 FTU Mask: XEN27
 
Let’s get started
 
Open new canvas 500x500 
Paste frame 5 on to canvas, resize 70%
Invert frame, paste paper 6 inside frame, and then move frame to top layer.
Apply glitter to canvas and move to bottom layer.
Activate frame layer, using your wand tool select inside frame.and paste tube inside. Re-size tube to 70%, press delete on keyboard, and blend luminance.
Apply heart swirl deco to canvas, place it to the bottom of frame.
Apply paper 4 to canvas, move to bottom layer,Apply mask, and merge layers>group.
Add your name, Add your credits/copyright.
Merge all layers visible and save to your PC.
Your Finished.