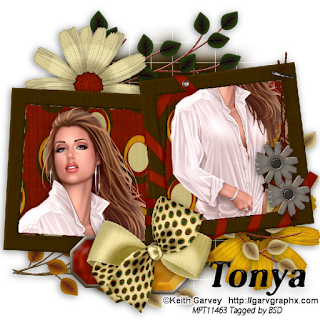
This tutorial was written on January 2,2011 by me and is of my own creative mind. Any other tutorials found to be similar is coincidental. A working knowledge of PSP is required to follow this tutorial.
This tag features Patty of Honored Scraps PTU kit "Resolutions". You can find this kit at Your Scrap Addiction in Honored Scraps shop. Also featuring "Black Dress" by the talented Ismael Rac. This tube is FTU and a license is required. This is a multi layer tube. I will use both layers.
Aside from the kit and tube above, for this tutorial you will need the following supplies:
Mask of Choice: I used mask1 by Candy's Treasures
Font of choice: I used Algerian (Any Bold font will be fine)
OKAY....Lets Play:
Open paper #11 in psp. Holding down the shift key and D at the same time will duplicate your paper,close out the original, and resize paper 600x600. Make sure your resolution is set to 72 and all layers are checked.
Go to Layers>Load/save mask>Load Mask from disk(choose your mask)>Load. Now in your Layers box right click your group layer and Merge Group.
Open Winter Rain Element, copy and past onto mask layer and resize 60%.
Open frame #2, Copy and past on top, resize 50%, center frame in the middle and add your drop shadow (2/-2).
With your magic wand tool select inside the frame, go to Selections>Invert and past paper #12 inside frame. On your keyboard press the delete key to remove access paper, noe deselect magic wand tool.
Open Balloon element #2, copy and past onto canvas, resize 60%. Move the balloon to the left of frame and add drop shadow. Do the same with balloon #3, this time resizing 50%.
Open Music Notes element, copy and past onto canvas and move it below frame #2, resize 70% and add your drop shadow.
Now were adding snowflakes to the top right hand side of tag. Both snowflake #9 and #2 should be re-sized to 15% with a drop shadow 2/-2.
Open your New Years Hat, copy and past onto canvas. Resize it to 20% and position it at the bottom right of tag, add drop shadow.
Open the Champagne glass element,Copy and past onto canvas, resize 15% and place in front of the hat. Add drop shadow.
Now were going to add our tube(close up layer) to the inside of our frame. Using your magic wand tool select inside of frame. Go to Selections>Invert. Copy and past tube into highlighted area(inside frame). Using your move tool, move your tube to desired position. I chose to accent her chest area. Once your positioned your tube inside frame, on your keyboard hit delete and deselect wand tool. Go to Layers box, (make sure to highlight tube layer) New Layer Group>select Luminescence Legacy>Apply>Merge Group.
With the same tube were going to add our full layer image to the left side of our tag, resizing 70% and add a drop shadow.
Now I'm going to put my name on my tag. I used a font called Algerian but any bold font will do. Open your text box and type the name or what ever text you desire. Colors should be black in both your foreground and background. Apply text and move to bottom left of tag just below our tubes legs. Go to Layers>convert to raster. You will need your text in raster layer before you can move on.
Next...
Go to Effects>Plug-in>Alien Skin Eye Candy 5:Impact>Gradient Glow.
Settings>Subtle White Glow
Basic>Glow Type:outside>Mask Selection (checked)>Glow Radias 5.00 >Soften Corners 0 >Overlay Opacity 100 >Distortion Amt. 0 >Distortion Lump size 100 >Gradient Smoothness 100 >
Random Seed 1 >Apply.
Now were going to add our copyright info/License #. Use the same foreground/background colors,font size 8, and place below your name. Convert to raster layer and add gradient glow using the same steps as you used to apply your name.
Go to Layers box(on your left) right click your mouse and merge all layers.
Your Finished!!
Thanks for trying my tutorial and have a wonderful New Year!!
~Tonya~
Go to Layers>Load/save mask>Load Mask from disk(choose your mask)>Load. Now in your Layers box right click your group layer and Merge Group.
Open Winter Rain Element, copy and past onto mask layer and resize 60%.
Open frame #2, Copy and past on top, resize 50%, center frame in the middle and add your drop shadow (2/-2).
With your magic wand tool select inside the frame, go to Selections>Invert and past paper #12 inside frame. On your keyboard press the delete key to remove access paper, noe deselect magic wand tool.
Open Balloon element #2, copy and past onto canvas, resize 60%. Move the balloon to the left of frame and add drop shadow. Do the same with balloon #3, this time resizing 50%.
Open Music Notes element, copy and past onto canvas and move it below frame #2, resize 70% and add your drop shadow.
Now were adding snowflakes to the top right hand side of tag. Both snowflake #9 and #2 should be re-sized to 15% with a drop shadow 2/-2.
Open your New Years Hat, copy and past onto canvas. Resize it to 20% and position it at the bottom right of tag, add drop shadow.
Open the Champagne glass element,Copy and past onto canvas, resize 15% and place in front of the hat. Add drop shadow.
Now were going to add our tube(close up layer) to the inside of our frame. Using your magic wand tool select inside of frame. Go to Selections>Invert. Copy and past tube into highlighted area(inside frame). Using your move tool, move your tube to desired position. I chose to accent her chest area. Once your positioned your tube inside frame, on your keyboard hit delete and deselect wand tool. Go to Layers box, (make sure to highlight tube layer) New Layer Group>select Luminescence Legacy>Apply>Merge Group.
With the same tube were going to add our full layer image to the left side of our tag, resizing 70% and add a drop shadow.
Now I'm going to put my name on my tag. I used a font called Algerian but any bold font will do. Open your text box and type the name or what ever text you desire. Colors should be black in both your foreground and background. Apply text and move to bottom left of tag just below our tubes legs. Go to Layers>convert to raster. You will need your text in raster layer before you can move on.
Next...
Go to Effects>Plug-in>Alien Skin Eye Candy 5:Impact>Gradient Glow.
Settings>Subtle White Glow
Basic>Glow Type:outside>Mask Selection (checked)>Glow Radias 5.00 >Soften Corners 0 >Overlay Opacity 100 >Distortion Amt. 0 >Distortion Lump size 100 >Gradient Smoothness 100 >
Random Seed 1 >Apply.
Now were going to add our copyright info/License #. Use the same foreground/background colors,font size 8, and place below your name. Convert to raster layer and add gradient glow using the same steps as you used to apply your name.
Go to Layers box(on your left) right click your mouse and merge all layers.
Your Finished!!
Thanks for trying my tutorial and have a wonderful New Year!!
~Tonya~