Friday, January 7, 2011

Be Mine

Be Mine
This tutorial was created by me on 1-4-11 and is of my own ideas. Anything similar is a coincidence. A working knowledge of PSP is required for this tutorial. The PTU kit used in this tutorial belong to the lovely MJ of My Sweet Tater and can be purchased at I Got Lucky Skraps. 

Supplies you will need for this tut are as follows:
~ Paint Shop Pro 9 but any version should work
~Scrap-Kit of choice: I used Don’t Bug Me by My Sweet Tater
~Tube of choice: I used Keith Garvey " My Valentine" (you can purchase a license and his tube at MPT)
~Mask: I used Myth24 by Creative Misfits
~Font of choice: I used Improir

Let’s Get Started
Open a new canvas: Transparent, 600x600 @ 72.000
Open your paper WRAP_BUGME6(2), resize 600x600 then copy and paste onto your canvas.
Go to Layers>Load/save mask>Load Mask from disk (choose your mask)>Load. Now in your Layers box right click your group layer and Merge Group.
Open your frame WRAP_BUGME1(3) and resize to 500x462, copy and past on top of mask layer. We’re going to resize the frame again, this time to 80% and add your drop shadow (2,-2). Using your move tool position your frame to the center of your tag. Now using your magic wand tool highlight the inside of your frame. Go to selection>Invert. Open paper WRAP_BUGME6(3), copy and paste into highlighted frame. Go to Image>Re-size>30%>Apply. Then right click your mouse to deactivate wand tool and add drop shadow.
Copy and paste your tube on top of frame, go to Image>Re-size>70%>Apply. We want the tube to look as if she’s coming out of the frame. So, position your tube center of the frame, some of the tube will hang off the bottom. We’re going to use our freehand selection tool (settings: point to point) to remove the part that hangs off. Using the inside of frame as your guide, highlight the part that hangs off on the left, once highlighted hit delete on your keyboard. Do the same to the right side. Now add your drop shadow.
Open element WRAP_BUGME3(18)  and past onto canvas and resize 10%. Go to Image>Rotate>Freehand>25.00>Apply. Move element to bottom of heart frame(middle) and add drop shadow.
Open element WRAP_BUGME4(33)  and past onto canvas and resize 10%, move element to the bottom left of your tag and add drop shadow.
Now we’re going to add the flowers all along the left side of our frame. Open element WRAP_BUGME2(10) and past onto canvas>resize 10%, place your flower element so half is out and half is hidden behind WRAP_BUGME6(3) layer(this is the paper you used inside your frame). Go to Layers>Duplicate and repeat 4x with space in-between each and adding drop shadow to all white flowers. You are now going to add WRAP_BUGME2(1) on top of frame layer above the first white flower. Go to Layers>Duplicate and repeat 5x placing each red flower in the space between the white flowers and add drop shadow to all red flowers.
Open WRAP_BUGME3(14). Copy and paste on top of frame layer, right side, resize 25% and add drop shadow.
Open WRAP_BUGME4(25) and place on the upper left side, half on flower and half on frame, add drop shadow.
We’re now going to add our name to the center of the heart that our bear element is holding. Open your text box, type in your name (font and size of choice) and apply. Position your text using your move tool to the center of black heart. Open WRAP_BUGME1(14) and paste onto canvas, resize to 10%, and move it on top of the bears left hand and add drop shadow. Use your eraser tool (size 5) to remove the part of the stick that is over the hand. This will give the look of the bear holding the sucker.
Finally, add your proper credits (tube artist, license #, etc.) using the text box. Once you have applied your credits and positioned them on your tag, I put mine on the bottom right; you can now merge your layers. Go to Layers>Merge>Visible>Apply. Lastly…save your creation. Go to File>Save As>File Name (Name your tag) and File location (where on your PC you store your creations)
Thank You for trying my tutorial and I hope you enjoyed it. I’d love to see your results. Send your results to tonyaweb@live.com and I will post them on my blog.
((HUGS)) BSD


Monday, January 3, 2011

2011

This tutorial was written on January 2,2011 by me and is of my own creative mind. Any other tutorials found to be similar is coincidental. A working knowledge of PSP is required to follow this tutorial.
This tag features Patty of Honored Scraps PTU kit "Resolutions". You can find this kit at Your Scrap Addiction in Honored Scraps shop.  Also featuring "Black Dress" by the talented Ismael Rac. This tube is FTU and a license is required. This is a multi layer tube. I will use both layers.
Aside from the kit and tube above, for this tutorial you will need the following supplies:
Mask of Choice: I used mask1 by Candy's Treasures 
Font of choice: I used Algerian (Any Bold font will be fine)

OKAY....Lets Play:
 Open paper #11 in psp. Holding down the shift key and D at the same time will duplicate your paper,close out the original, and resize paper 600x600. Make sure your resolution is set to 72 and all layers are checked.
Go to Layers>Load/save mask>Load Mask from disk(choose your mask)>Load. Now in your Layers box right click your group layer and Merge Group.
Open Winter Rain Element, copy and past onto mask layer and resize 60%.
Open frame #2, Copy and past on top, resize 50%, center frame in the middle and add your drop shadow (2/-2).  
With your magic wand tool select inside the frame, go to Selections>Invert and past paper #12 inside frame. On your keyboard press the delete key to remove access paper, noe deselect magic wand tool.
Open Balloon element #2, copy and past onto canvas, resize 60%. Move the balloon to the left of frame and add drop shadow. Do the same with balloon #3, this time resizing 50%.
Open Music Notes element, copy and past onto canvas and move it below frame #2, resize 70% and add your drop shadow.
Now were adding snowflakes to the top right hand side of tag. Both snowflake #9 and #2 should be re-sized to 15% with a drop shadow 2/-2.
Open your New Years Hat, copy and past onto canvas. Resize it to 20% and position it at the bottom right of tag, add drop shadow.
Open the Champagne glass element,Copy and past onto canvas, resize 15% and place in front of   the hat. Add drop shadow.
Now were going to add our tube(close up layer) to the inside of our frame. Using your magic wand tool select inside of frame. Go to Selections>Invert. Copy and past tube into highlighted area(inside frame). Using your move tool, move your tube to desired position. I chose to accent her chest area. Once your positioned your tube inside frame, on your keyboard hit delete and deselect wand tool. Go to Layers box, (make sure to highlight tube layer) New Layer Group>select Luminescence Legacy>Apply>Merge Group.
With the same tube were going to add our full layer image to the left side of our tag, resizing 70% and add a drop shadow.
Now I'm going to put my name on my tag. I used a font called Algerian but any bold font will do. Open your text box and type the name or what ever text you desire. Colors should be black in both your foreground and background. Apply text and move to bottom left of tag just below our tubes legs. Go to Layers>convert to raster. You will need your text in raster layer before you can move on.
Next...
Go to Effects>Plug-in>Alien Skin Eye Candy 5:Impact>Gradient Glow.
Settings>Subtle White Glow
Basic>Glow Type:outside>Mask Selection (checked)>Glow Radias 5.00 >Soften Corners 0 >Overlay Opacity 100 >Distortion Amt. 0 >Distortion Lump size 100 >Gradient Smoothness 100 >
Random Seed 1 >Apply.
 Now were going to add our copyright info/License #. Use the same foreground/background  colors,font size 8, and place below your name. Convert to raster layer and add gradient glow using the same steps as you used to apply your name.
Go to Layers box(on your left) right click your mouse and merge all layers.
Your Finished!!
Thanks for trying my tutorial and have a wonderful New Year!!
~Tonya~

2011 Quick Page (Freebie)

 This Quick Page was created by me using Patty of Honored Scraps PTU scrap kit "Resolutions".
You can find this kit HERE and just click on image for download.
This QP is 3600x3600 @ 300dpi
Personal Use Only & Credit is Required

Wednesday, December 29, 2010

Fallen

 Credits to: Zindy Nielsen for the Tube and Candy's Treats for the Mask
Today I decided to tag my own kit. I love this kit and I love the book that inspired me to create this kit. The book that inspired me so much is "Fallen" by Lauren Kate and It is an awesome read.If your into romance w/ a twist of angel vs. Demon action then go get this book!!!! It is the first in her series and is just one of those books you just can't put down. Anyway...I hope ya like my tag/kit.
Now I'm off to dinner w/ my mom!!

Tuesday, December 28, 2010

Classic Christmas

I created this lovely forum set using Karin of Karin Kreates Scraps PTU kit "Classic Christmas". You can find this kit at I Got Lucky Skraps.
PS...Karin's got this lovely holiday kit on sale...50% Off!!!!

Tube used in forum set is copyright to Christina Kotiark

Wednesday, December 22, 2010

Christmas Spirit

For this cute lil tag I used "Spirit of Christmas" by Stacey's Designs. You can find her PTU kit at Your Scrap Addiction. Tube used in this tag is "A Little Girls Christmas" by Judy Mastrangelo, a Christmas gift to me from MPT, and the mask used is by Vix_mask4christmas.
Also, here are previews of two quick pages I made with the same kit. (click on Stacy's Designs, above, to get download link)
Dear Santa...

2010 Holidays

Sunday, December 12, 2010

Posion

Here's another tag I made using the PTU kit "Posion" by Heart of Essence. 
You can find this lovely kit at I Got Lucky Skraps. 
(Thanks so much Tracey for allowing me to use your kit!)
credits:
Mask by WSL_84

Dangerous

Here's a new tag I made using the PTU kit "Posion" by Heart of Essence. 
You can find this lovely kit at I Got Lucky Skraps. 
(Thanks so much Tracey for allowing me to use your kit!)
credits:
Mask used 0901 by VIX
Tube by Armondo Huerta

Saturday, December 4, 2010

Christmas Morning

This tutorial was written on December 4,2010 by me and is of my own creative mind. Any other tutorials found to be similar is coincidental. A working knowledge of PSP is required to follow this tutorial.
This is the second tag I made  features Patty's of Honored Scraps
 PTU kit "Christmas Treasures". You can find this kit at Your Scrap Addiction Store in Honored Scraps shop.  The lovely PTU tube used is  by the talented Barbara Jensen and a license is required to use.
                                        This is a very cute Christmas kit, Thanks Patty!!!
Aside from the kit and tube above, for this tutorial you will need the following supplies:
Paint Shop Pro 9
Winter Mask by Jenny

Okay Lets create a tag...
*I put drop shadows on all elements*
Open a new canvas 600x600, transparent and flood fill white.
Go to Layers>load/ save Mask>Load Mask from Disk: Select mask of choice and adjust settings(fit to layer/Source luminance/hide all mask) then load your mask.
Now merge your layers (layers>Merge>Merge Group).
Copy and past Candy Cane frame 1into your canvas and resize 80% and add drop shadow. Use your magic wand tool to select inside the frame. Once highlighted go to Selections>invert and past paper #13 onto canvas and delete. now copy and past tree #1 into frame(on top of paper). Position tree to your liking, mine is to the left, and delete. Deselect magic wand too and add drop shadow. 
Copy and past the red poinsettia onto lower right side of your frame, add drop shadow and go to Layers>duplicate and move copied poinsettia to left side of frame.
Copy and past Christmas Vine to both sides of frame, position under poinsettia layer, and apply your drop shadows.
Copy bow #3 to the left side of frame,on top left and resize 50%,add drop shadow.
Repeat last step, this time using bow #4 and apply it to the right side of frame.
Copy and past Stocking # 3 on top of the bow on the right and add drop shadow.
Copy and past Holly Time element to the bottom of frame in the center, resize 80%, add drop shadow.
Now lets add your tube. Copy and past your tube into your canvas, resize 80% , position in center of your frame and add drop shadow.
Copy and past gift box #7 into your canvas, resize 40%, position in-between your tubes legs, and ad drop shadow,
Using your text box, using your colors and font of choice, add your name to the top of the stocking. Size and position to your liking.
Add your copyright info, merge all layers and save (PNG OR J PEG).
Finished!!!
*Thank You for trying my tutorial and Happy Holidays*
BSD

Happy Holidays


This tag features Patty's of Honored Scraps
 PTU kit "Christmas Treasures". You can find this kit at Your Scrap Addiction Store in Honored Scraps shop.  The lovely tube used is  by the talented Celine. This tube is PTU and a license is required from MPT to use. Tag Template used is by Mellisaz Creations for Creative Misfits.
This is a very cute Christmas kit, Thanks Patty!!!

*No Tut for this tag*

Thursday, December 2, 2010

Sweet Mornings

This tutorial was written on December 1,2010 by me and is of my own creative mind. Any other tutorials found to be similar is coincidental. A working knowledge of PSP is required to follow this tutorial.
This tag features Karin of Karin Kreates Scraps PTU kit "Comfy Coffeehouse". You can find this kit at I Got Lucky Skraps in Karin's shop.  Also featuring "His Shirt" by the talented Keith Garvey. This tube is PTU and a license is required.
Aside from the kit and tube above, for this tutorial you will need the following supplies:
Mask of Choice: I used WSL #84
Font of choice: I used Kozuka Mincho Pro H

OKAY...Lets Play:
Lets start by  opening a blank canvas 600x600. The canvas should be set to transparent.
Open paper #3 and resize to 600x600 then Copy and past paper #3 into your canvas, Go to Layers>load/ save Mask>Load Mask from Disk: Select mask of choice and adjust settings then load your mask. Now merge your layers(layers>Merge>Merge Group).
Add your branches...
 Copy and past Leafy Branch #1 to the top center of mask and add a drop shadow, then copy and past both Leafy branches # 5 & 2 and place at the bottom, add drop shadow. 
Add your flowers..
Copy and past flower #7 to top left corner, resize 70% and position on top of leaves and add drop shadow. Now add flower #6 to the bottom right corner, resize 70%, position under the leafy branch-sticking out a little and add drop shadow.
Lets add the frame now...
Copy and past frame #7 on top & resize 65%, add drop shadow.
With your magic wand click inside the left side of frame, go to selections>invert and past paper #4 into frame and deselect your magic wand tool. You will now repeat for the right side of frame.
Copy and past beaded string to top left corner of frame and add drop shadow.
Copy and past #2 & 4 brads side by side, slightly overlapping, below your frame add drop shadows. Then copy and past bow #10 on top of brads, add drop shadow.
Okay Now add our Tube..
Using your magic wand tool highlight the inside of frame on left side. go to selections>invert then Copy and past the close up tube into frame,resize 50%. Position tube inside frame using your move tool till it is to your liking then deselect magic wand tool. Add drop shadow to your tube. On the right side of your frame were going to add the full body tube. So,.. highlight the frame using your magic wand tool, go to selections>invert and then past tube inside frame. Position it to your liking with the move tool then deselect your magic wand tool and add drop shadow.
Adding Text...
Using your chosen font add your name (text size of My name is 48, color black) to the bottom right corner of tag and Convert text to raster layer. Go to Effects>Plugins>Eye Candy 5>Glass effect. Play with the settings until you have the desired glass look then apply.
Finally...Add your copyright info and save.
Thank You for trying my tutorial. I'd love to see what you creat with it
tonyaweb@live.com

Wednesday, December 1, 2010

Comfy Coffeehouse Quick Page Freebie

 This QP was created by me using the kit Comfy Coffeehouse by Karin of Karin Kreates Scrapz. Please visit her shop  in the IGLS store if you are interested in having this kit. This QP is PERSONAL USE ONLY, created at 3600x3600 and 300 dpi

HOHOHO

Heres a tag using Sarah of Hungry Hills FTU kit Crazy 4 Christmas 
just in time for the holidays. So pop on over to Sarahs blog and 
grab this adorable Christmas themed kit.

Monday, November 29, 2010

Music In Memory

 
Music In Memory was created using Sarah of Hungry Hill Dreamerie kit. This pay to use kit can be purchased here.
 I must say I have worked with several of Sarah's kits now and this one is my all time fav. As soon as I opened this kit I saw several tags I wanted to make. At this time I only have one to show. The others will come soon I'm sure. Thanks a bunch Sarah for letting me use your kit.

Thursday, November 18, 2010

Almost Wonderland Quick Pages 1 & 2

                                    For both of these quick Pages  I used  "Almost Wonderland" by Melissa of WDDesignz 
I had so much fun with this kit. The elements and papers in this kit are just adorable.
You can find this kit at I Got Lucky Skraps and download both QP's FREE. 
Thanks Melissa for allowing me to use your kit. 

Escaping Wonderland

This tutorial was written by me on November 18th, 2010 and is the result of my own ideas. 
Any resemblance to any other tutorial is purely coincidental. I am using a PTU kit so no 
supplies will be provided only links to supplies I a using.

PSP Version used: 9, but should work in other versions and 
this tutorial assumes you have a good working knowledge of PSP.

Supplies Needed
Scrapkit of your choice, I am using "Almost Wonderland" by Melissa of WDDesignz 
Amazing kit!! I had so much fun with this kit. The elements and papers in this kit are just adorable.
You can find this kit at I Got Lucky Skraps and Thanks Melissa for allowing me to use your kit.  

No tube was added to this tag but feel free to do so in creating your own.

Mask used is WSL#75

Plug In needed: Alien Skin Impact 5

Font of Choice: I used Beyond Wonderlad

OK..Lets Play!!

Place your Mask into the mask file in your PSP folder.
Now open a new image 600x600 with a transparent background
Open paper #4 and resize to 600x600, copy and past onto your blank canvas then close the original.
Go to Layers,select your mask.Mask setting should be as follows:Orientation-fit to canvas/Options-show all mask/Create Mask From-source luminance, load mask, and merge group.
Open the grass element,copy and past to the lower part of your tag, on top of mask then close the original.
Open the book element,copy past on top of the grass,resize 60% and add drop-shadow.
Copy and past the vine with light element on top of the left page of the book then resize 85% and add drop-shadow.
Now open the journal #3 element and place to the top right of your tag, resize 50%.Add drop-shadow,position the journal allowing the vine to overlap it slightly on the left side.Then use your magic wand tool and select the middle of journal,go to selections>invert ,copy and past paper #27 then deselect.
 Copy and past the cats face into the center of the journal,no need to resize,go to effects>plug-in>extrude.Play around w/ the setting and apply the depth you like best and apply. This effect will give your cat face a 3D appearance.
Next add the heart clouds to the upper right hand side,on top of vine and slightly overlapping the journal.
Now copy and past the Ca3 element just below the journal:giving the look of flying out of the book, resize 50% and add drop-shadow.
Copy and past the brown rock to the center of the page on the right page of the book, add drop-shadow then copy and past flowers 1,4,6 to the front of the rock and add your drop-shadow.
Copy and past the yellow butterfly's to the right of the book, just above the grass, resize 50% and add drop-shadow.
Add swirl to the right bottom corner of the journal and resize 80%.
Copy and past the leaves in the grass on the left side in front of the book and resize,add drop-shadow.
Copy and past the white flower element in front of the leaves and use the deform tool to turn it on it's side,resize then add drop-shadow.
Finally, use your chosen font and add your name using color and text size of choice.Convert text layer to raster layer then go to effects>plug-ins>gradient glow. 
Settings should be as follows:
Glow Type:outside glow/Radius 5.00/Soften Corners 12/
Opacity 100/Distortion Amt.12/Lump size 100/Gradient Softness 100
Apply and position text bottom center of tag.
Merge all layers visible
Now save in PNG...Your All Done!!! 


Thanks for looking at my very first  tutorial. I hope it was easy to follow and that you enjoyed it.

Tuesday, November 16, 2010

Autumn Blessings

I created this quick page using Always Creations kit "Autumn is Here"
This kit can be purchased at The North Wing. Feel free to download this QP 
 

Thursday, November 4, 2010

Autumn Breeze


 This tag was created by me on November 3, 2010 and is the result of my own ideas.  Any resemblance to any other tag is purely coincidental and unintentional.

Supplies and Credits
Scrap kit of choice: I'm using a wonderful kit by Kimmies Kreations called "Autumn Splendor".  This is a nice kit, good for your autumn projects. You can purchase this terrific kit at I Got Lucky Skraps.
PSP Version used: PSP 9

Mask of choice

Font of choice: I used Harrington

 Tube of choice: I used Keith Garvey "His Shirt"

Thanks for looking!

Monday, November 1, 2010

Ice Angel


Ice Angel

This tag was created by me on November 1, 2010 and is the result of my own ideas.  Any resemblance to any other tag is purely coincidental and unintentional.

PSP Version used: PSP 9 but should work in other versions.

Supplies and Credits
Scrap kit of choice: I'm using a wonderful kit by Sarah of Hungry Hill called "Ice Angel".  I loved this kit, it has so many wonderful elements and is perfect for your winter themed projects.  Thanks so much for letting me use your kit Sarah!  You can purchase this terrific kit at Asylum-The North Wing.

Mask of choice: I used VIX mask 404, download HERE.

Font of choice: I used Script MT Bold 

Poser Tube of choice: I used Victoria by Granny Art.  Granny has many FTU poser tubes on her 
site. Please be sure to say TY upon downloading
 

Thanks for looking & Happy Scrapping!

Friday, October 29, 2010

I'm A Winch + Pearl Island

I'm A Winch
Pearl Island

This tag was created by me on October 29th, 2010 and is the result of my own ideas.  Any resemblance to any other tag is purely coincidental and unintentional.

PSP Version used: PSP 9 but should work in other versions.

Supplies and Credits
Scrap kit of choice: I'm using a wonderful kit by Sarah of Hungry Hill called"Pearl of the Caribbean" .  I loved this kit, it has so many wonderful elements and is perfect for any projects.  Thanks so much for letting me use your kit Sarah!  You can purchase this terrific kit at Asylum-The North Wing.

Tag One
Mask of choice: I used the map mask that was included in the kit .

Font of choice: I used Skullphabet

 Tube of choice:  is copyrighted to the lovely Barbara Jensen and is PTU. 
Tag Two
No masks, templates, or tubes used on this one.


Thanks for looking & Happy Scrapping!


Wednesday, October 27, 2010

Seductive Elegance + Freebie Quick Page


 using the kit March Mayfair by Candy of Candy's Treasures
Please visit her shop in the IGLS store if you
are interested in having this kit.
Tube used in this tag is by Ismael RAC and can be purchased HERE

Now to the Free QP...Memories
(click on image to go to store)

Monday, October 25, 2010

Halloween Havoc

It's Halloween Havoc week at the asylum and we've all begun to celebrate my favorite holiday...Halloween!!! Tyger offered up a PTU kit, not yet released in stores, of hers to the inmates, and since I'm obviously an inmate...I got the goodies!!! TY Tyger!!!

The Kit used is Thank Fall (Release Date November 1,2010) PTU by Tyger of Tyger's Tidbits.
The awesome Tube used is PTU Blueberry Halloween by the lovely Barbara Jensen
Mask used is by VIX #421.
TXS for looking!!!

Also, I tried my hand at another Avatar...Same elements and tube used as the tag above.

Saturday, October 23, 2010

Brunettes Do It Better

I created this tag using the PTU kit Brunette by  Irene Knight~EHKHO.Please visite her shop in the IGLS store if you are interested in having this kit. Poser(s) used in this tag is by Seven's Toobs,
 I just adore her posers. Mask used is by WSL_Mask81 and you can find it here.
I also created this QP using the same kit. You can get it free HERE.

Whats Your Sign?


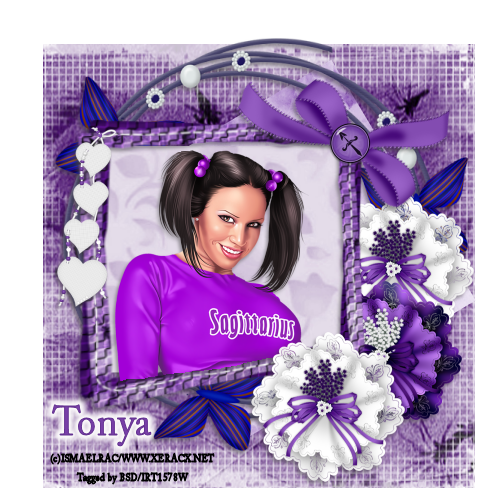
The Kit I  used to create this tag is Sagittarius by Ruth of  Scrapin Daisy 
and you can find it Here
Tube used is PTU by Is Ismael Racks Sagittarius and can be purchased here
Here is a lil gift I made for Ruth with her kit...
My first time ever making an Avatar
Also, I made a QP that will be for FREE at I Got Lucky Skraps latter today
This QP is 3600x3600 @ 300dpi

Tuesday, October 19, 2010

We'll always have Paris

I made this lovely tag using Artmama's FTU scrap kit called C'est Paris which you can find on her blog HERE. Mask used is by VIX # 355 and you can find it HERE. Tube used is by the Awesome Barbara Jensen. You can get her tube HERE.

Monday, October 18, 2010

Treacherous

Kit used is by Stu of Creative Crazy Scraps. You can find this PTU kit Here.
Thank You Stu!!!
Poser used is by Untamed Anger FTU and can be found HERE.

Friday, October 8, 2010

Erotic Letters

I created this beautiful tag using Ivy's Inspirations FTU kit"Love Letter" which you can find HERE
Tube used is PTU by Ismael RAC and you can purchase it Here

Monday, October 4, 2010

Pet Cemetery


I created this spectacular tag using Sarah of Hungry Hill PTU kit... 
Whatz A Ghoul To Do? and Mask used is WSL_Mask84
It was such a groovy kit to work with,TY Sarah for hooking me up!!!!
As I was looking at all the elements it reminded me of the old Stephen King movie, Pet Cemetery...lol.
Hope ya like it!!!

Awareness

As you may know the month of October is Breast Cancer Awareness month. so here is a tag I created to show my support. FTU Kit is by 
http://scrapsdimensions-dorisnilsa.blogspot.com/
Tube is PTU by RAC

Fact:
Breast cancer is the most common cancer among American women. Today, approximately 1 in almost every 8 women (13.4%) will develop breast cancer in her lifetime. Breast cancer is the second-leading cause of cancer death in women  -- and is the leading cause of cancer death among women ages 35 to 54.

Tears of Blood

This tag was created by me and is of my own idea. 
The FTU Kit  is Darkness by Creations By Witchys Heart. 
All supplies for this tag are located in the darkness kit.
Mask 023 by Becky
OMG...I love this tag!!! Probably the best one I've done yet...lol.

Tuesday, September 21, 2010

NY State of Mind

Okay...I came across this FTU kit by  Lacarolita's Designz and knew I wanted to do a tag with it. The elements in this kit and the song Empire State of Mind by Alicia Keys was my inspiration. Tube is PTU by XERACX

Here's the video if anyone is interested in listening.

Crazy Bitch

The best tag I've done yet... I think...lol.I had sooo much fun with this kit.
A BIG Thanks to  Lacarolita's Designz for this awesome FTU Kit...No Angels.
Mask #79 by WSL
PTU Tube by XERACX