Friday, July 8, 2011
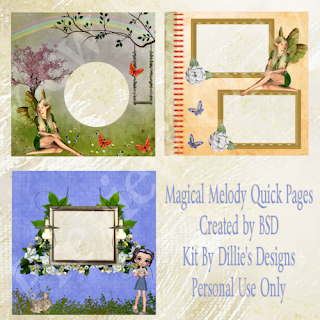
Magical Melody
I created these quick pages using Dillie's Designs PTU scrapkit "Magical Melody". You can purchase this kit @ Lollipops N Gumdrops and for download info of the qp's please click on the preview to visit Dillie's Designs blog.
Fiona's Roses Blog Set
I created this blog set using Dare's Designz PTU kit "Fiona's Roses". For download instructions please click on the preview to visit Dare's Designz blog. To purchase this kit please visit her shop at The Creativity Box. This is a stunning scrapkit with a zillion and one possibilities. Thanks DD for allowing me to use your kit in my creations!!!
Thursday, July 7, 2011
Wanted
This Tag was created by me on July 7, 2011.Any tag similar to this is coincidental and by no means is associated with such tag/tutorial. “ All supplies used are credited to the artist/copyright owner with a link to their products and no supplies are provided by this site/me.
Supplies used for this Tag are credited to:
Program: PSP9
PTU Kit: Crack Shot By: Hungary Hill
PTU Tube by: Keith Garvey purchased @ PTE
(both tubes are by Garvey and are PTU. License is required)
FTU Mask: #29 By: Horseplay’s Pastures
Font: Kozuka Mincho Pro H
Wednesday, July 6, 2011
Love In The Dark
Love in the Dark
This Tutorial was written by me on July 6, 2011.Any tutorial similar to this is coincidental and by no means is associated with such tutorial. “Love In The Dark” was written assuming its followers have working knowledge of PSP and its functions. All supplies used are credited to the artist/copyright owner with a link to their products and no supplies are provided by this site/me. If you follow this tut please give credit to BSD, Broken Sky Dezine, or http://brokenskydezine-gallery.blogspot.com. Either one of the three options are acceptable.
Supplies used for this Tutorial are credited to:
Program: PSP9
PTU Kit: Whispers of Passion By: Foxy’s Designz
PTU Tube by: Zindy Nielsen
FTU Mask: #30 By: Horseplay’s Pastures
Font: Lucida Calligraphy
Let’s get started
Open a new canvas 500x500. Re-size paper 3 to 500x500 and paste onto your canvas. Apply your mask and merge layers. Place element 39 on top of merged mask layer, resize 80%, and move to the top right of mask. Place element 28 on top of element 39, on left side. Open element 3, go to image and flip then apply element 3 to your canvas. Re-size 45%, place on left side of mask and use deform tool to tilt it up slightly to the left. Apply element 1, resize 30%, duplicate 2x and place them along element 3. In your layers box (the little eyes) click on them to deactivate each layer except layers 1,3, and both duplicates of 3, Now right click on top element in layers box and merge visible. Un-click all the x’s to reactivate all your layers. Click on the newly merged layer, go to Layer>Duplicate, then go to Image>Flip. Apply element 5, resize 25%, and place in the center of floral arrangement. Duplicate element 5 2x and place each duplicate at each end of the floral arrangement. Apply element 26, resize 45%, and use deform tool to tilt to the right. Select inside element 26 with your magic wand tool. Go to Selections>Modify>expand>7>ok. Go to Selections>Invert and place paper 2 inside highlighted area. Press delete on keyboard and deactivate tool. Apply element 9, resize 25%, and place under element 25 (center bow). Apply element 22, resize 25%, and place at the bottom right. Move element 22 down in the layers box until it is below the frame layer. Apply element 37, resize, and place on the right side on top layer. Activate element 26 (frame) layer, select inside element 26 with your magic wand tool. Go to Selections>Modify>expand>7>ok. Go to Selections>Invert and apply your tube. Go to layers>blend>Luminance, and merge group. Apply your name using chosen font and then your credits. Merge all layers visible and save as png or jpeg to your PC.
Thanks for trying my tutorial!!!
Subscribe to:
Posts (Atom)


